Zetec Conversion - Winter 2010/11
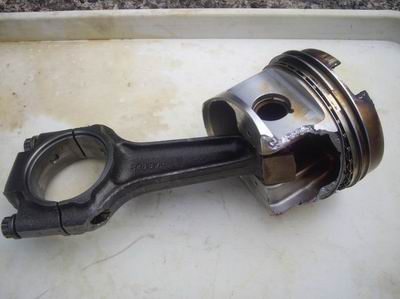
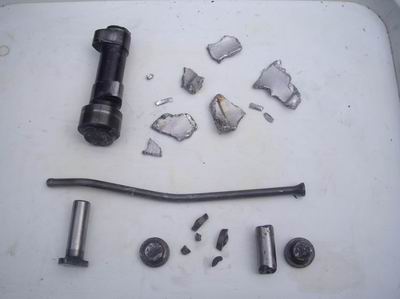
In July 2010 C7CAT suffered catastrophic engine failure as a result of overheating problems
(see Bergerac Blat 2010). The results of this failure can be seen below.
No-one that I have spoken to can be absolutely sure of what happened, but it seems likely that
piston no. 4 'dropped' its skirt on one side. This then became wedged between the block and the
camshaft, albeit momentarily as it broke up, this in turn would appear to have broken the camshaft which
resulted in the cam followers breaking up and the push rods became bent in the process. The second photo shows the
(larger) contents of the sump.
Although there was very little else wrong with the engine (with the majority of parts being sold on to other x/flow enthusiasts)
I decided, after much deliberation, that it was time to say goodbye to the x/flow, a faithful servant of 72,140 miles, and
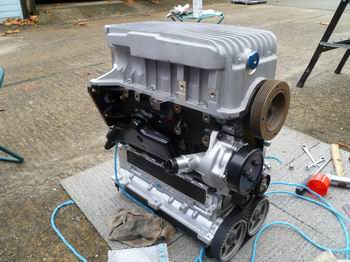
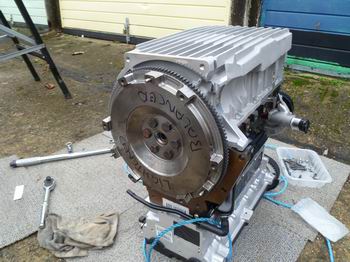
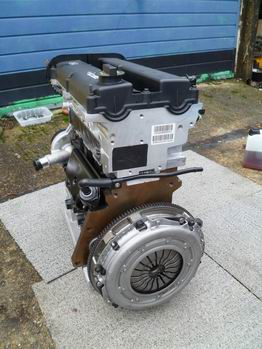
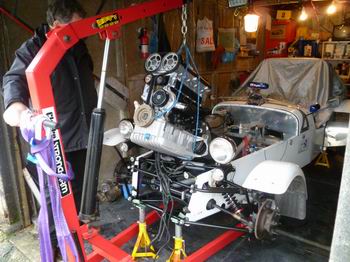
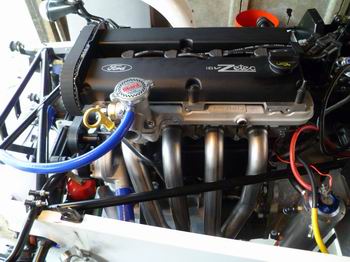
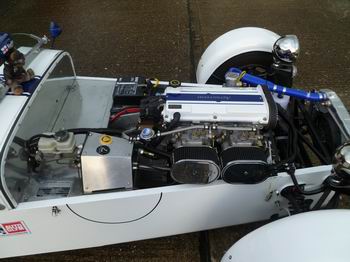
take this opportunity to upgrade/convert to a Zetec engine. So I met with Pete and Chris from Raceline and after much
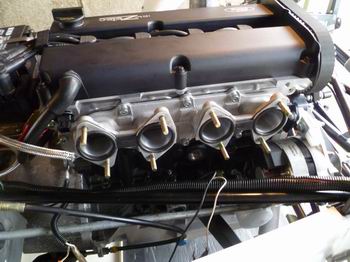
discussion I decided upon their Zetec-R 190 engine running on carbs. In order to keep the costs down
I decided to remain with my 40DCOE carbs although this would mean I wouldn't achieve the full potential of the engine.
My reasoning for this is that in the longer term I will be looking to convert to full injection
and I felt that there was little point in upgrading to 45DCOEs at this stage.
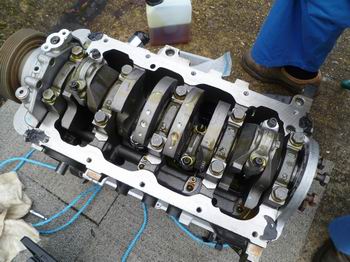
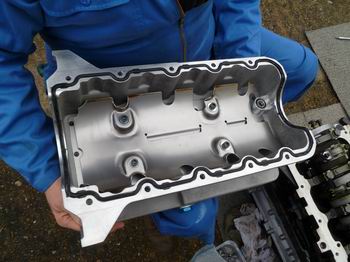
The following photos show the conversion from beginning to end. Unfortunately, although I had the intention of photographing every little step,
the photos tailed off as I got busier and more enthusiastic about finishing the installation. Hopefully what follows gives an idea of the process...
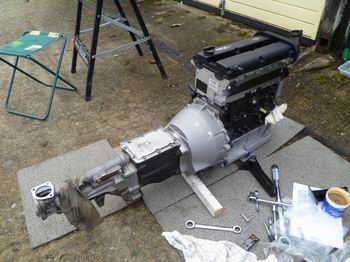
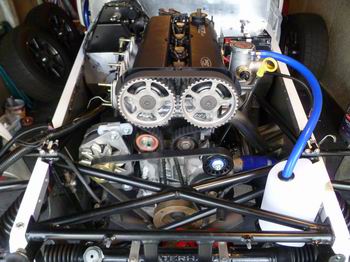
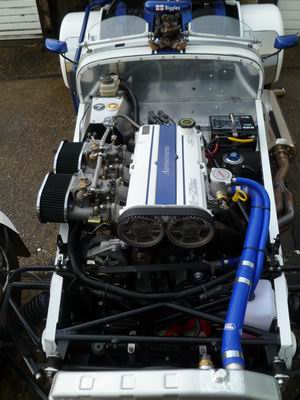
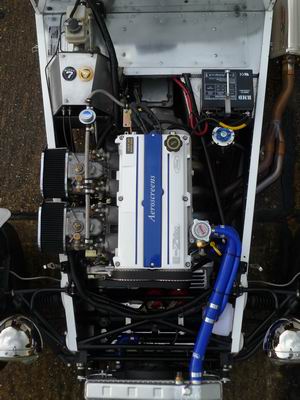
...and now proudly fitted
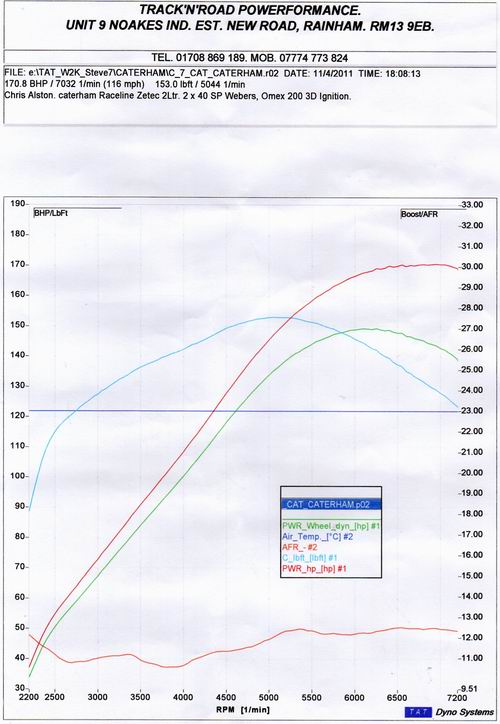
The installation was finished just before the end of February 2011 thus enabling me to get the 7 taxed and start
to start running it in from March 1. I managed 468 miles before taking it to the two Steves and Track 'n' Road in Rainham on April 11.
The final results were, 170.8 bhp at 7,032 revs and 153.0 lbft at 5044 revs. See the graph below.
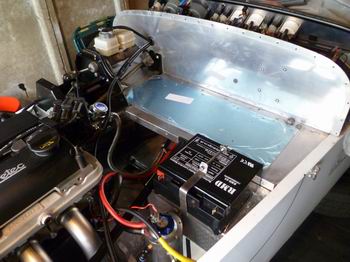
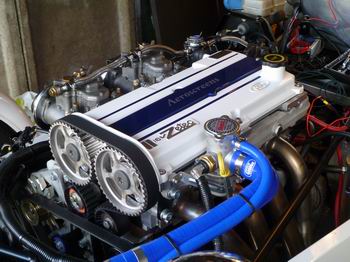
Final photos of the finished project
As ever, with any new installation, there are a few niggles and despite numerous calls to Pete and Chris at Raceline they were
always willing to offer advice and assistance. Also I am indebted to Nick Westbrook for his help in sorting out the
electrics and wiring upgrades and in particular to Brent Chiswick who has spent many hours not only in my garage, but
also on the phone, email and text imparting his knowledge and experience of converting his x/flow to Zetec power many years ago.
Once the Zetec engine was installed I, rather paranoically, became concerned about running a cambelt without
a cover (no such problems on the x/flow other than a weedy looking alternator belt) and the likelihood of stones
etc being thrown up into the engine bay with disastrous consequences.
Originally, the plan was to just find some fine mesh and cable-tie this to the chassis tubes underneath and
while this would enable me to still view the engine bay from below I felt sure the nuisance factor of cutting
the cable-ties and replacing them every time would just grate.
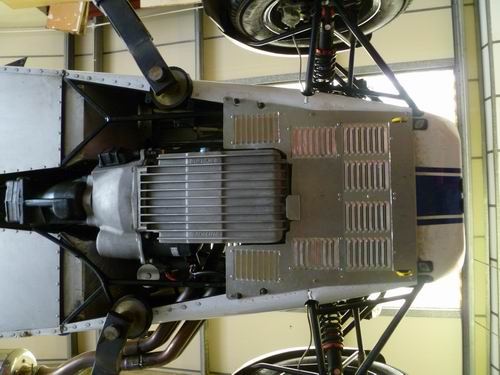
I somehow ended up talking to Guy Lowe about this and found that he had already done this with sheet aluminium.
He very kindly sent me a cardboard template. With template in hand I visited Richard Young who very quickly made
the undertray (it certainly helps if you have the right tools etc, not to mention skills) using 16 gauge
aluminium. I decided to fix the undertray using M4 rivnuts, 3 on each side and 1 in the cruciform. This has
made removal and fitting very easy. What is probably not obvious from the photo is that the front edge has been
bent up at right angles to strengthen the front and it fits flush with the front botton chassis member behind
the nosecone.
My next concern was trapping heat in the engine bay and I explored various measures such as 2" diameter holes
covered with mesh, NACA ducts etc. I finally settled on aluminium louvres. I managed to pick up 4 pairs from
eBay for just a few quid.
Next stop ended up being a visit to Brent's (again right person, right skills, right tools)as we decided on
where to site the louvres and finally fit them.
The end result can be seen in the photo below. Note there is a small 'tongue' which was incorporated to protect
the oil temp sender and wiring at the front of the sump.
So many thanks to Guy for the template, Richard for the aluminium, his time and skills and Brent also for his
time and skills. I've no doubt I could have fabricated something similar myself, but it would have taken
10 times as long and looked awful.
The new engine has dramatically changed the way the car drives, a few extra ponies always helps, and I will look forward
to, hopefully, many more miles with this upgrade.
In some ways I'm sorry to see the x/flow go as it just had so much character and it was, undoubtedly, a throwback to the past
(at least I still have the wonderful induction noise of the carbs). In my possession that engine had covered 54,850 miles
(50,847 since the rebuild by Roger King) and during that time, in addition to blatting and touring, it completed
24 trackdays and 15 sprints/hillclimbs.